Objectives
In this Lab, you will be required to build the second version of our Donation Case Study App, called Donation.2.0. Here, we introduce some simple menu handling and evolve the Donation Android app to include a Report view. We also make use of a simple ArrayAdapter to display donation data in our Report.
Package Name
This is the version from the previous Lab of the Donation app:
and this is the current version of the Donation app (Your Starter Code for this lab)
I'd recommend downloading the 'Starter Code', but if you wish to continue using your version (1.5) you would need to 'refactor' it to Donation.2.0. At the time of writing, Android Studio's refactoring features and tools are still a bit iffy :-) but you could go ahead and
- Close the current project
- Copy and rename the Donation.1.5 folder to Donation.2.0
- Open the Project Donation.2.0 in Android Studio
And don't forget to update your app_name resource in your strings.xml.
We should also take this opportunity to change the name of the 'ie.app' package to 'ie.app.activities', as we will be introducing other packages later on.
So create a new package called ie.app.activities (in the main folder)
and drag in your Donate.java into this new package. You can delete the empty package (if Android Studio hasn't done it already)
Do the same for the ApplicationTest class.
Next, check that the import statement in Donate.java is as follows:
import android.widget.Toast;

import ie.app.R;

public class Donate extends AppCompatActivity {
  ...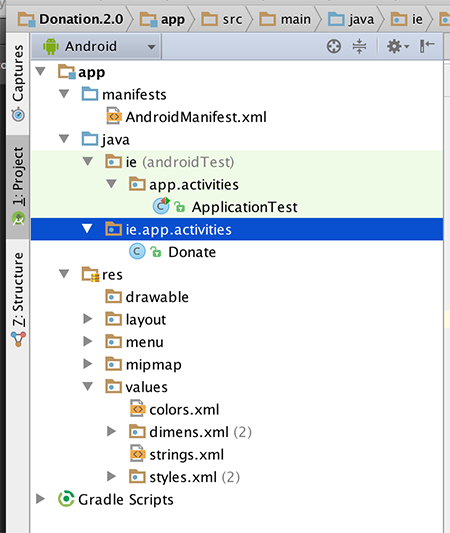
So make sure your project structure looks like the above before continuing.
Also, don't forget to change the app_name string resource in your strings.xml.
Whether you've downloaded the Starter App or continued on with your own app, you should still "Clean" your project at this stage "Build->Clean Project", and then Rebuild & finally run your app, to make sure everything is ok.
Working with Menus
Open res/values/strings.xml and introduce a new String resource like this:
<string name="menuReport">Report</string>We have a menu resource called menu_donate.xml in the res/menu folder. Modify this file by adding this new menu item:
  <item
       android:id="@+id/menuReport"
        android:orderInCategory="100"
        android:title="@string/menuReport"
        app:showAsAction="never"/>
(Make sure it is within the 'menu' element)
In Donate.java, change the onOptionsItemSelected() method to look like this:
@Override
public boolean onOptionsItemSelected(MenuItem item) {
switch (item.getItemId())
{
case R.id.menuReport:
Toast.makeText(this, "Report Selected", Toast.LENGTH_SHORT).show();
break;
}
return super.onOptionsItemSelected(item);
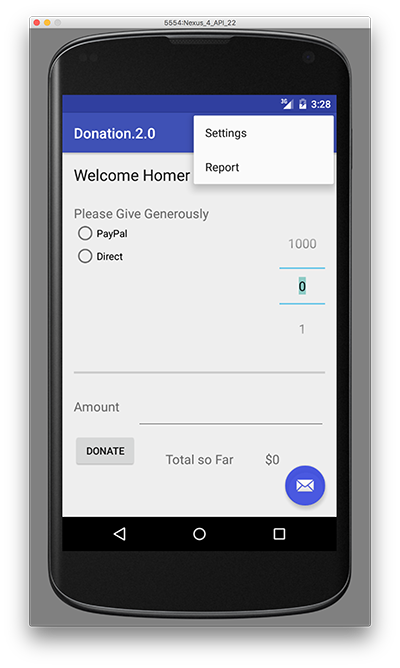
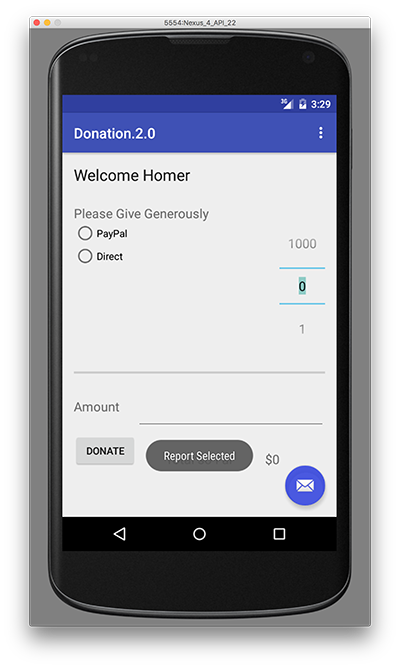
}Run the app and when you press the menu button (or the overflow menu) and select 'Report', you should see the toast message appear.
Reports Activity
Before we start to design a new activity, Add a string resource in res/values/strings.xml:
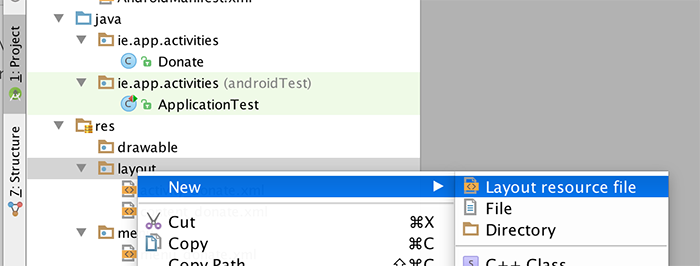
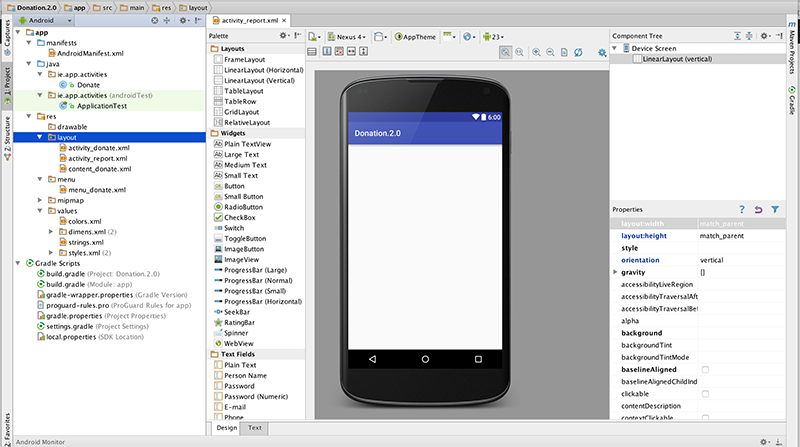
<string name="reportTitle">Report</string>Design a new layout called activity_report. Do this by locating the res/layout folder and selecting "New->Layout resource file", like so:
You can choose all the defaults for this layout.
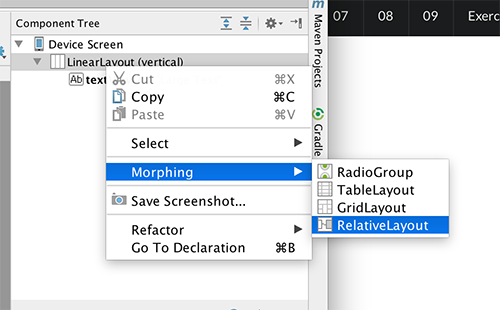
"Morph" our layout from Linear to Relative, like so,
and build a layout similar to the following:
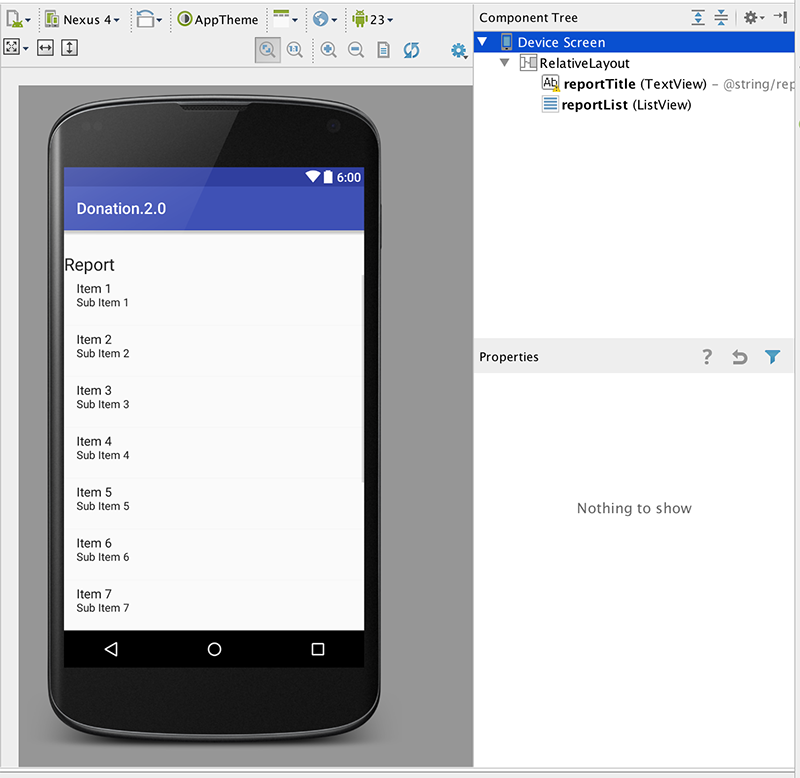
This is the layout file itself, if you just want to overwrite the xml:
<?xml version="1.0" encoding="utf-8"?>
<RelativeLayout xmlns:android="http://schemas.android.com/apk/res/android"
android:orientation="vertical" android:layout_width="match_parent"
android:layout_height="match_parent">
<TextView
android:layout_width="wrap_content"
android:layout_height="wrap_content"
android:textAppearance="?android:attr/textAppearanceLarge"
android:text="@string/reportTitle"
android:id="@+id/reportTitle"
android:layout_marginLeft="0dp"
android:layout_marginTop="31dp"
android:layout_alignParentTop="true"
android:layout_alignParentStart="true"
android:layout_alignParentEnd="true" />
<ListView
android:layout_width="wrap_content"
android:layout_height="wrap_content"
android:id="@+id/reportList"
android:layout_below="@+id/reportTitle"
android:layout_alignParentStart="true" />
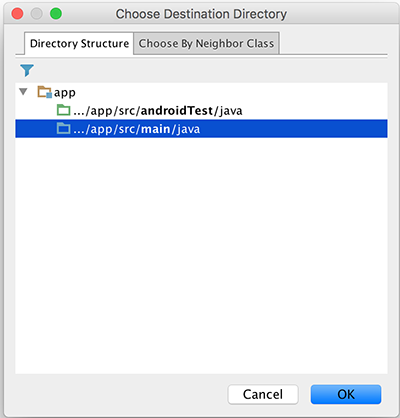
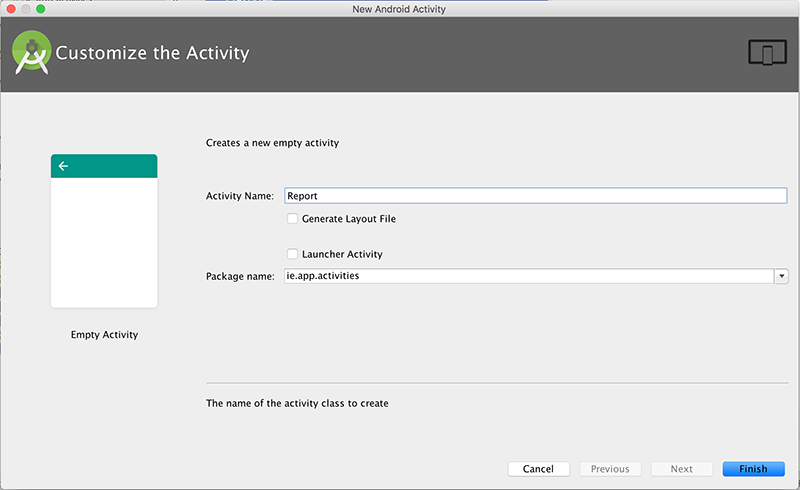
</RelativeLayout>Introduce a new "Empty Activity" into ie.app.activities to render this activity - but be careful NOT to 'Generate Layout File' (as we have one already):
and replace it with the following:
package ie.app.activities;
import android.support.v7.app.AppCompatActivity;
import android.os.Bundle;
import android.app.Activity;
import android.widget.ArrayAdapter;
import android.widget.ListView;
import ie.app.R;
public class Report extends AppCompatActivity
{
ListView listView;
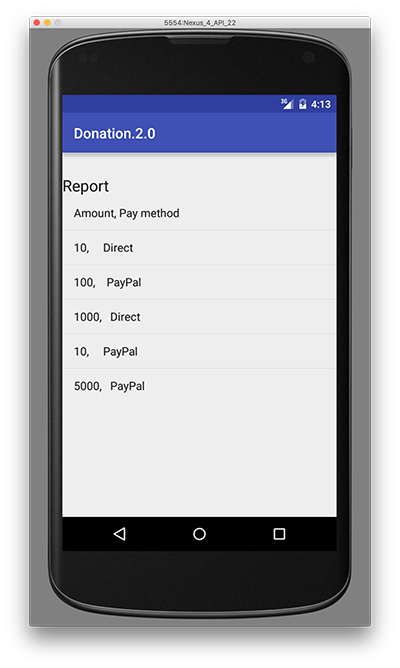
static final String[] numbers = new String[] {
"Amount, Pay method",
"10, Direct",
"100, PayPal",
"1000, Direct",
"10, PayPal",
"5000, PayPal"};
@Override
public void onCreate(Bundle savedInstanceState)
{
super.onCreate(savedInstanceState);
setContentView(R.layout.activity_report);
listView = (ListView) findViewById(R.id.reportList);
ArrayAdapter<String> adapter = new ArrayAdapter<String>(this, android.R.layout.simple_list_item_1, numbers);
listView.setAdapter(adapter);
}
}This will display a hard-coded lists of donations on the "Report Screen".
Change the Donation activity to load this view when "Report" is selected from the menu:
  @Override
  public boolean onOptionsItemSelected(MenuItem item)
  {
    switch (item.getItemId())
    {
      case R.id.menuReport : startActivity (new Intent(this, Report.class));
                             break;
    }
   return super.onOptionsItemSelected(item);
  }
Confirm that the activity specification has been added to the AndroidManifest.xml file:
      <?xml version="1.0" encoding="utf-8"?>
<manifest xmlns:android="http://schemas.android.com/apk/res/android"
    package="ie.app" >

    <application
        android:allowBackup="true"
        android:icon="@mipmap/ic_launcher"
        android:label="@string/app_name"
        android:supportsRtl="true"
        android:theme="@style/AppTheme" >
        <activity
            android:name=".activities.Donate"
            android:label="@string/app_name"
            android:theme="@style/AppTheme.NoActionBar" >
            <intent-filter>
                <action android:name="android.intent.action.MAIN" />

                <category android:name="android.intent.category.LAUNCHER" />
            </intent-filter>
        </activity>
        <activity android:name=".activities.Report" >
        </activity>
    </application>

</manifest>
Try it all now - it should load up, like below
Our Menu Revisited
When you navigate from the Donate activity to Report, there will be no menu available. So we need to first inflate the menu by introducing the following method into the Report activity, like so
@Override
    public boolean onCreateOptionsMenu(Menu menu) {
        // Inflate the menu; this adds items to the action bar if it is present.
        getMenuInflater().inflate(R.menu.menu_donate, menu);
        return true;
    }
Bring in a new menu item, 'Donate' - Donate should bring you back to the main Donate Screen.
This is a very similar approach to what you did in Step 02, so revisit this step and see if you can end up with something like the following for the Report Screen:

So when you select "Donate" you should be navigated back to the Donate activity (and vice-versa).
We'll look at populating the list with actual donations in the next lab.