The purpose of this step is to verify that your IntelliJ installation is working correctly. Please do this step regardless of whether you are using the college computers or your own computer.
Locate your IntelliJ application and start it (in windows, one easy way is to click on the search icon on your task bar and enter IntelliJ).
If this is your first time starting IntelliJ, you will probably be presented with a series options i.e. you might be:
-
asked if you want to import settings…you don’t need to import any settings.
-
presented with the User Licence Agreement…you will need to scroll to the bottom of this and accept it.
-
asked if you want to share anonymous data with Jetbrains (decide if you want to do this or not) and click the OK button.
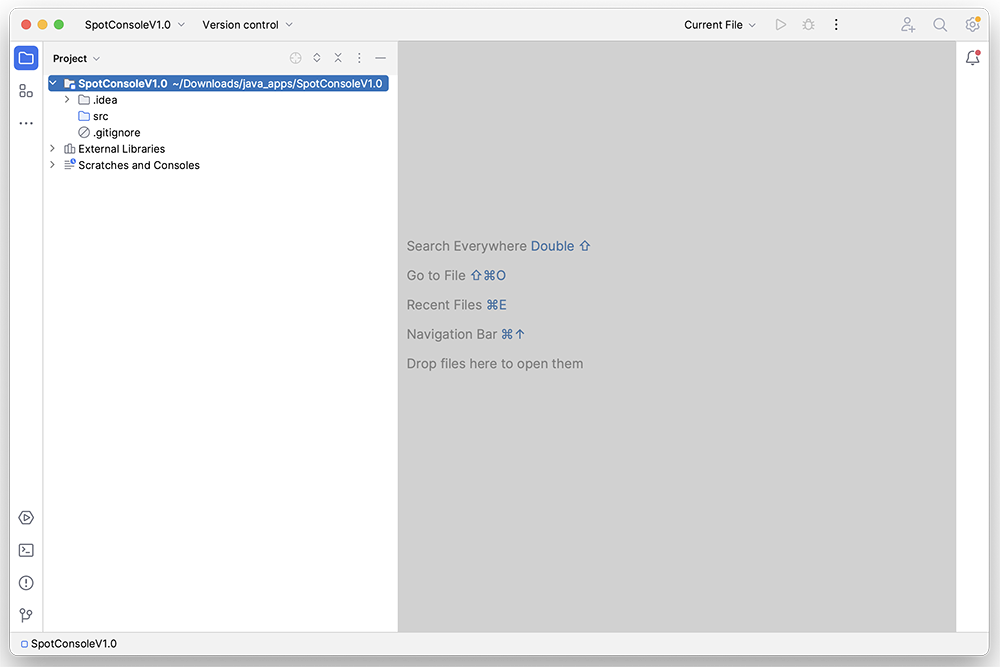
IntelliJ should now startup:
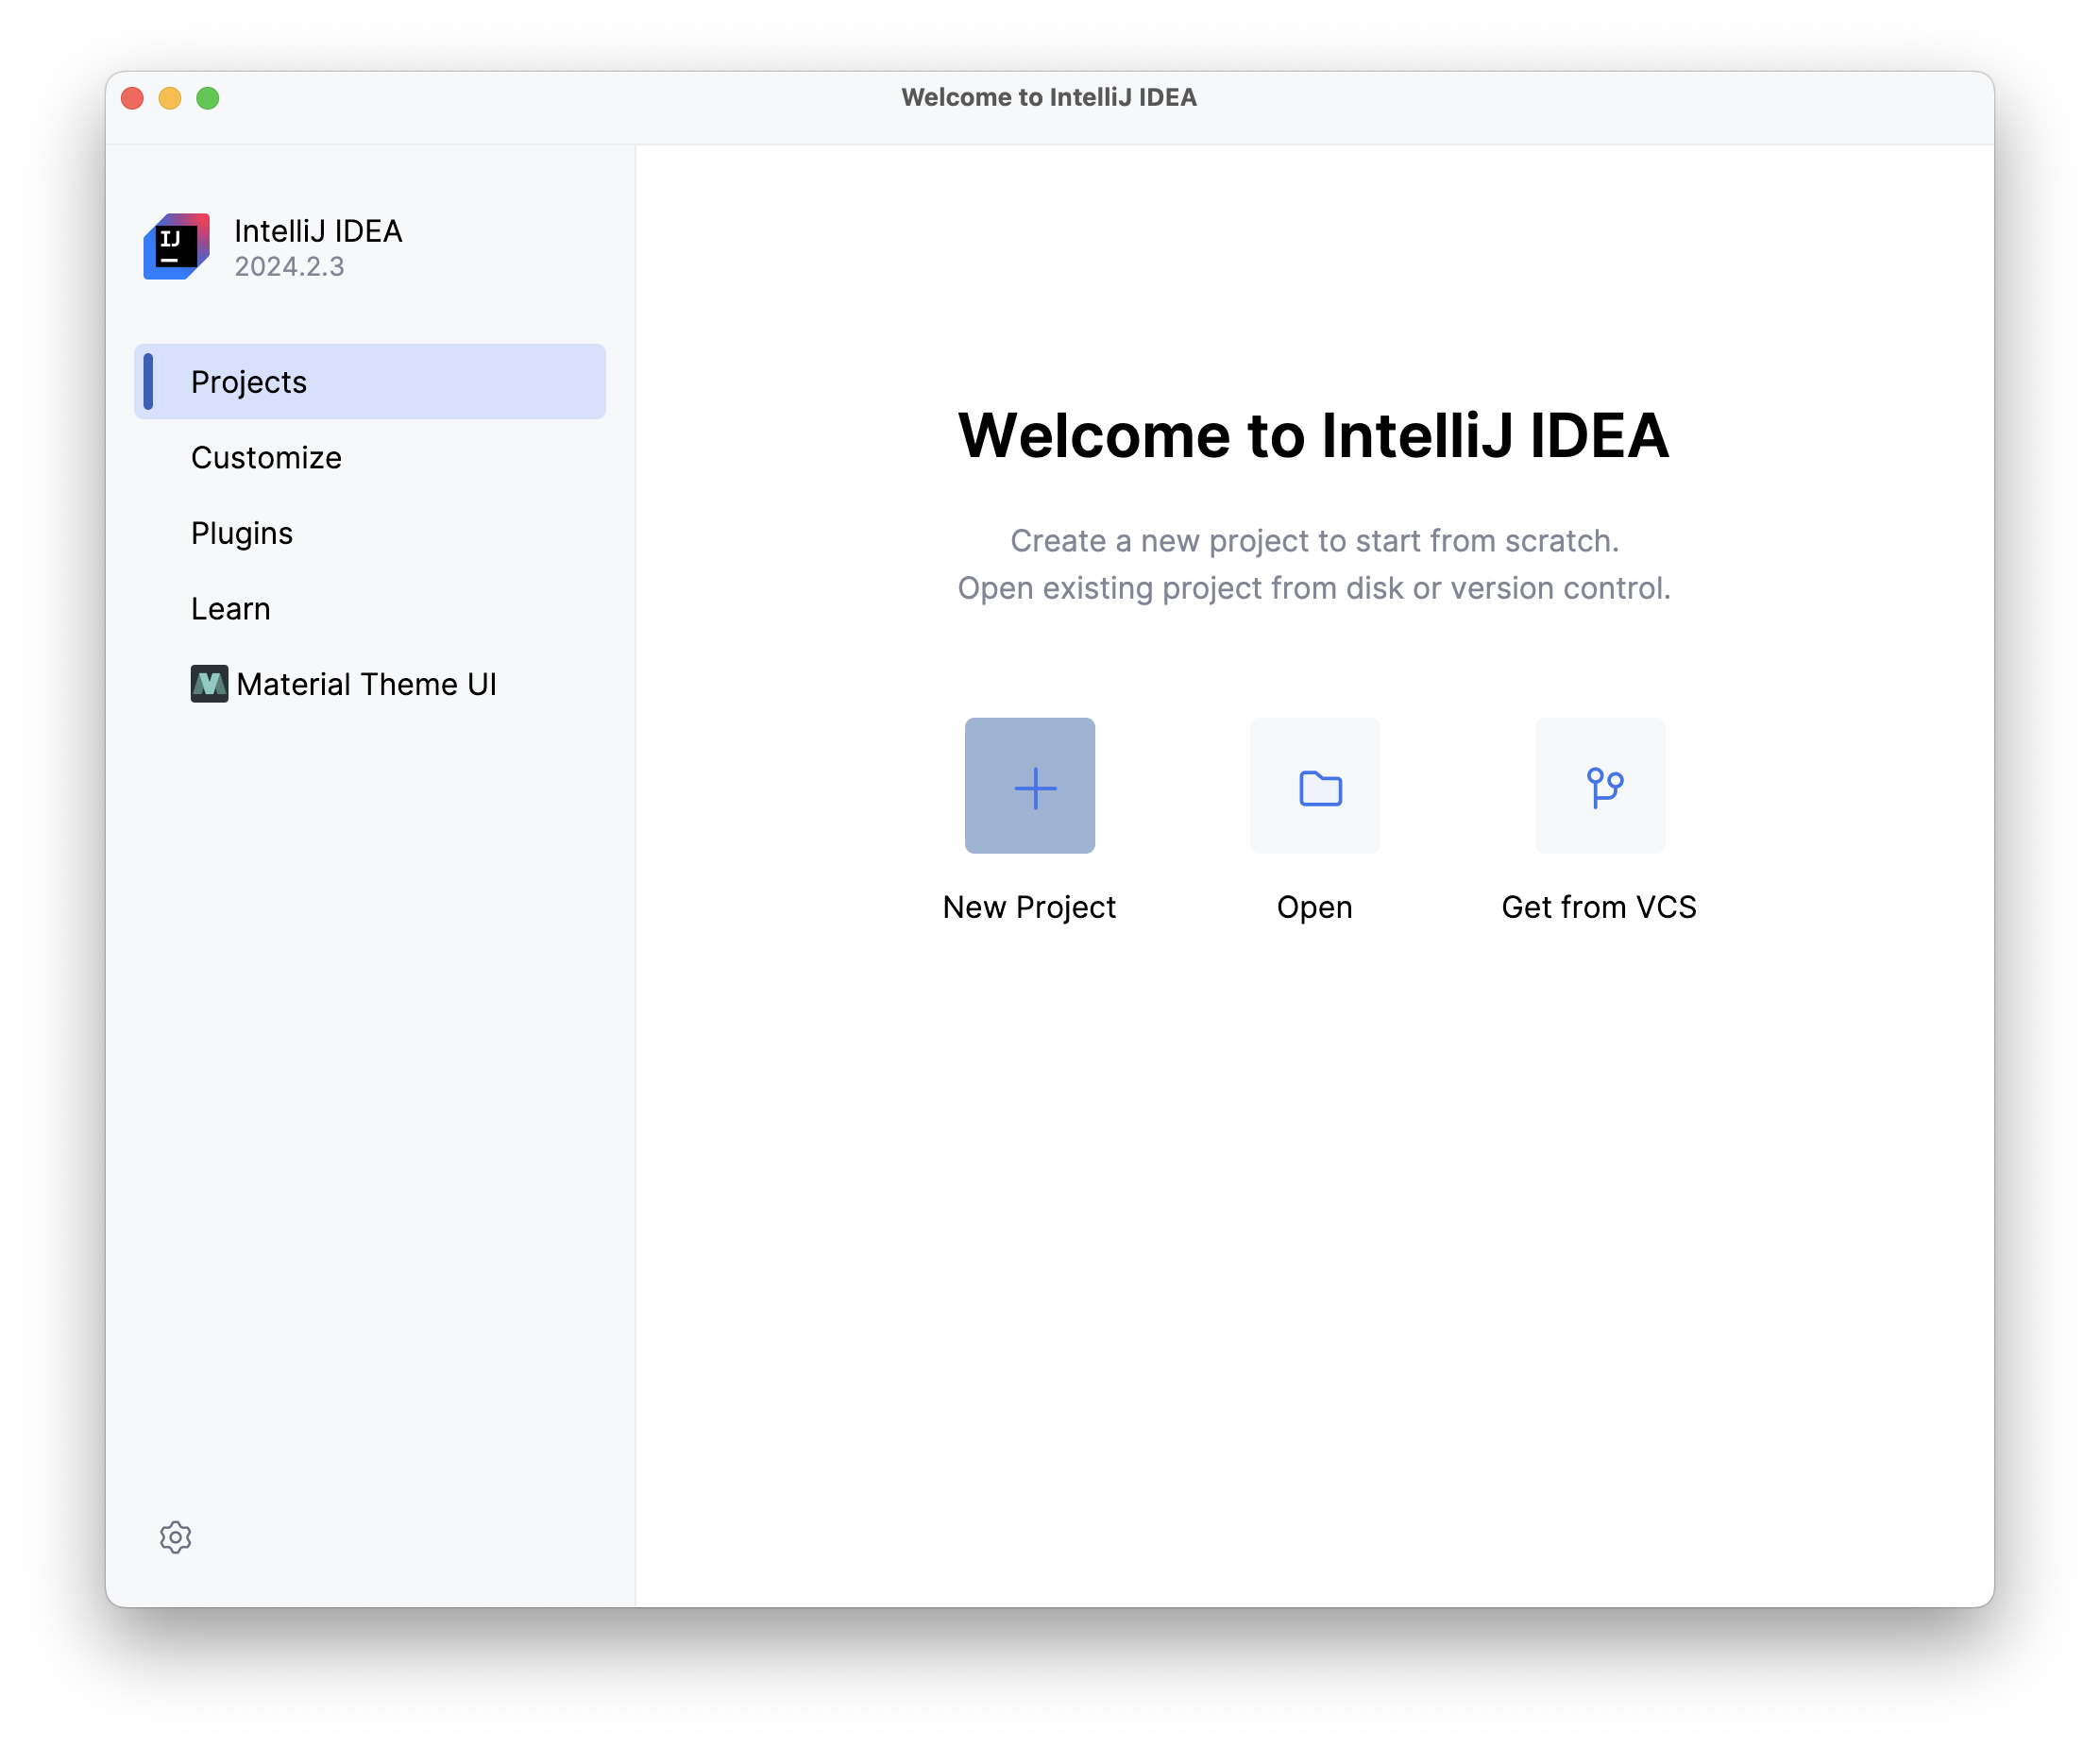
Click the New Project button. You should now see something like this:
If your installation says No JDK exists for the Project JDK OR it doesn’t point to the latest version you just installed, click on the Project JDK box:
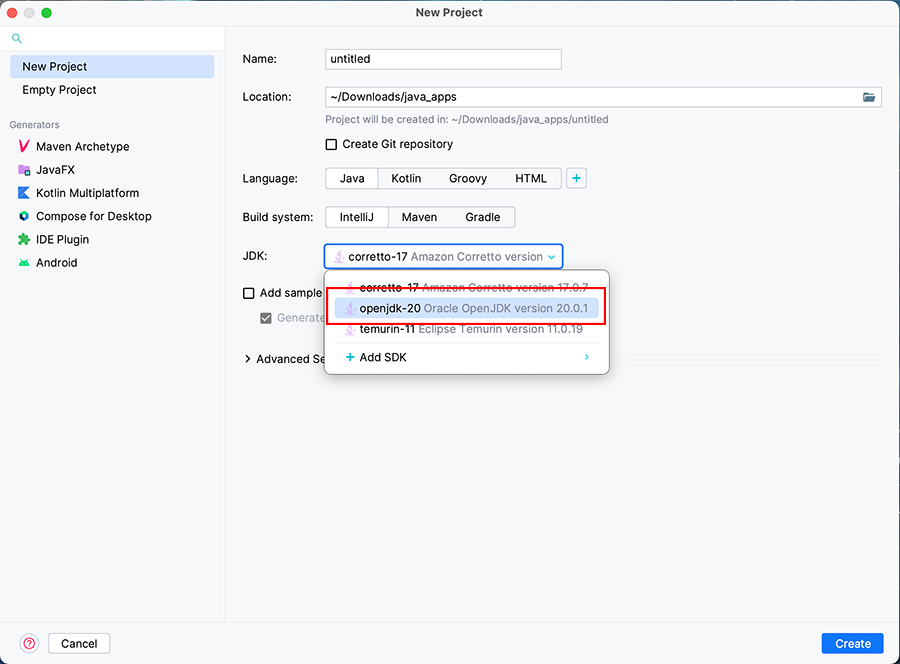
If the latest version of Java appears in the list, select it. If it doesn’t appear in the list, click the + Add SDK option and locate the version of Java you just installed.
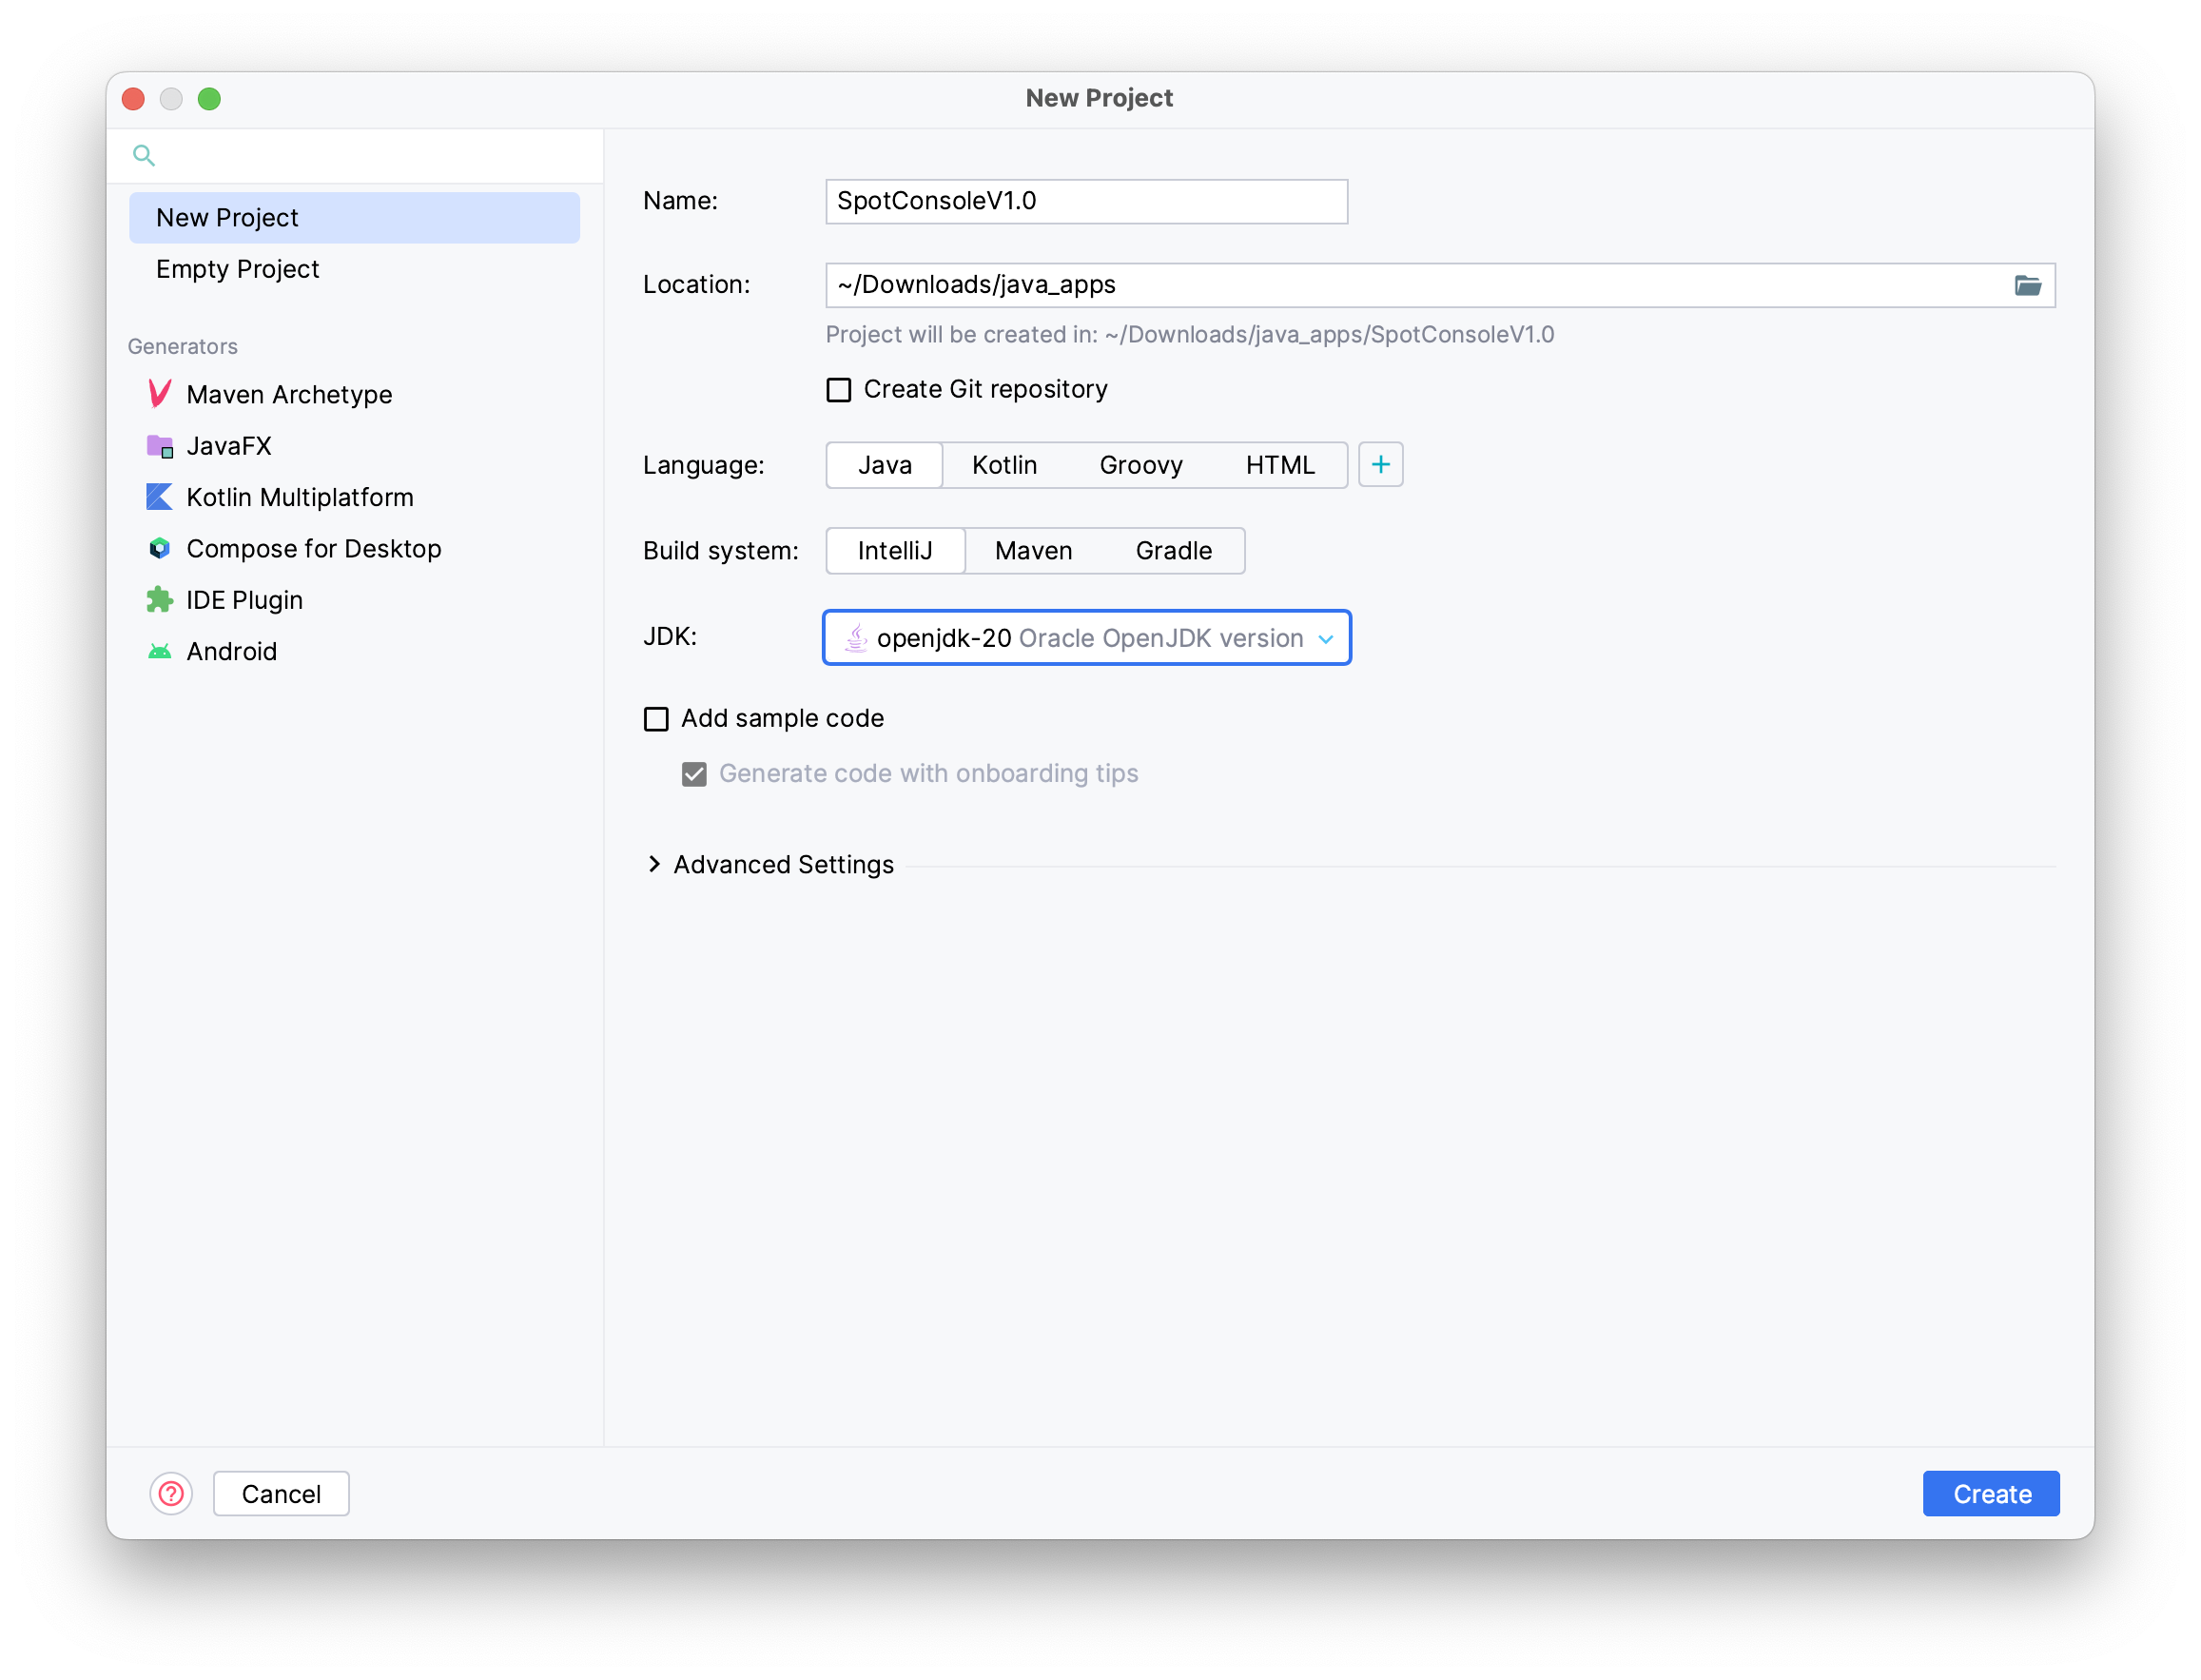
Now that we have a valid Project JDK, go ahead and enter the project name as SpotConsoleV1.0.
You will notice that your Project location changes automatically as you type, so I’d recommend changing it to something easy to remember in an easily accessible location on your computer.
Make sure the Language is Java and the Build System is IntelliJ like this :
 and finally click the
 Create button.
A new project is created for you (and a new folder location if one didn’t exist previously):
Close the Tip window, if it appears.
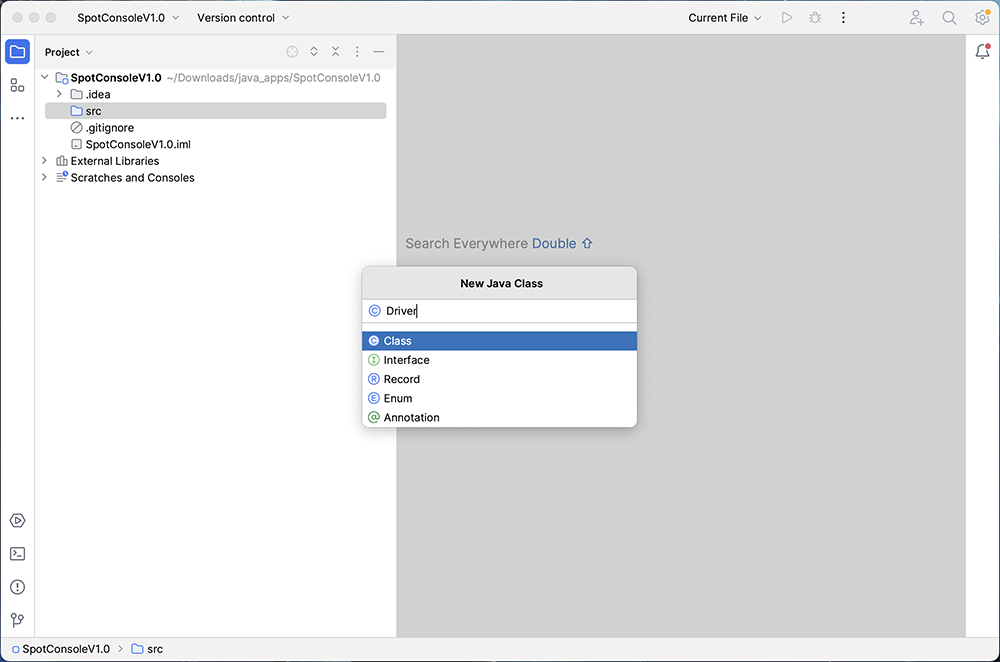
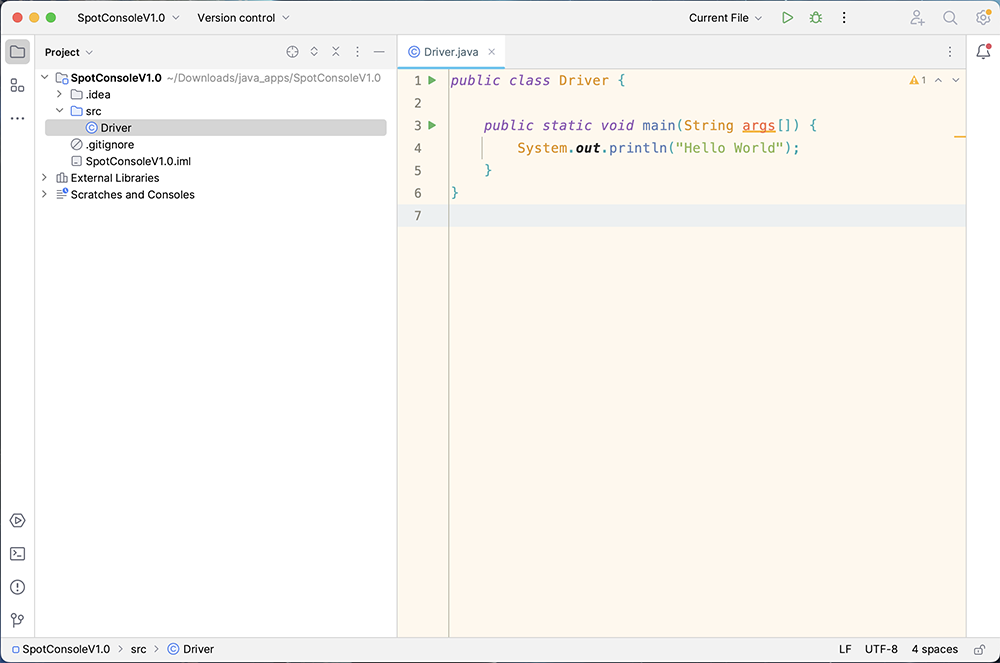
Right click on the src folder and select New, Java Class.
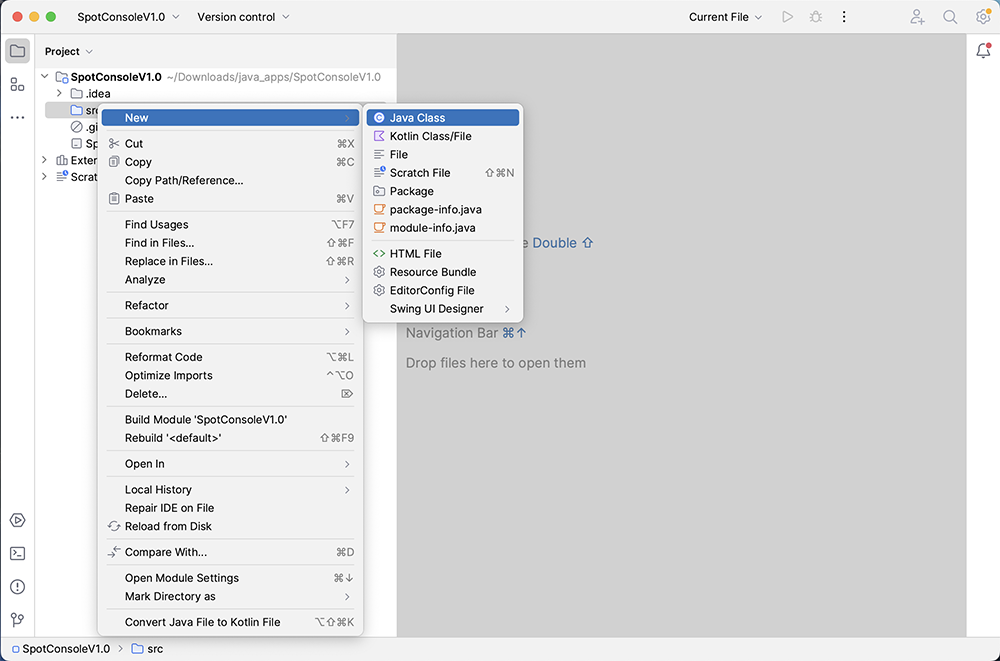
Name the class Driver.
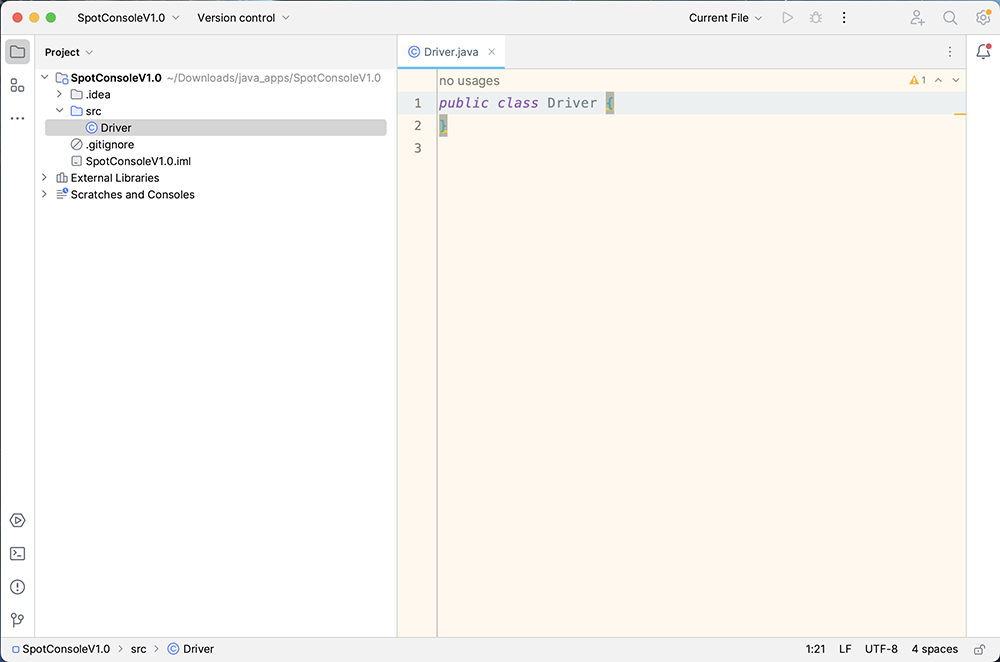
Your new Driver class should now be created:
Add the following method to the Driver class:
    public static void main(String args[]){
        System.out.println("Hello World");
    }
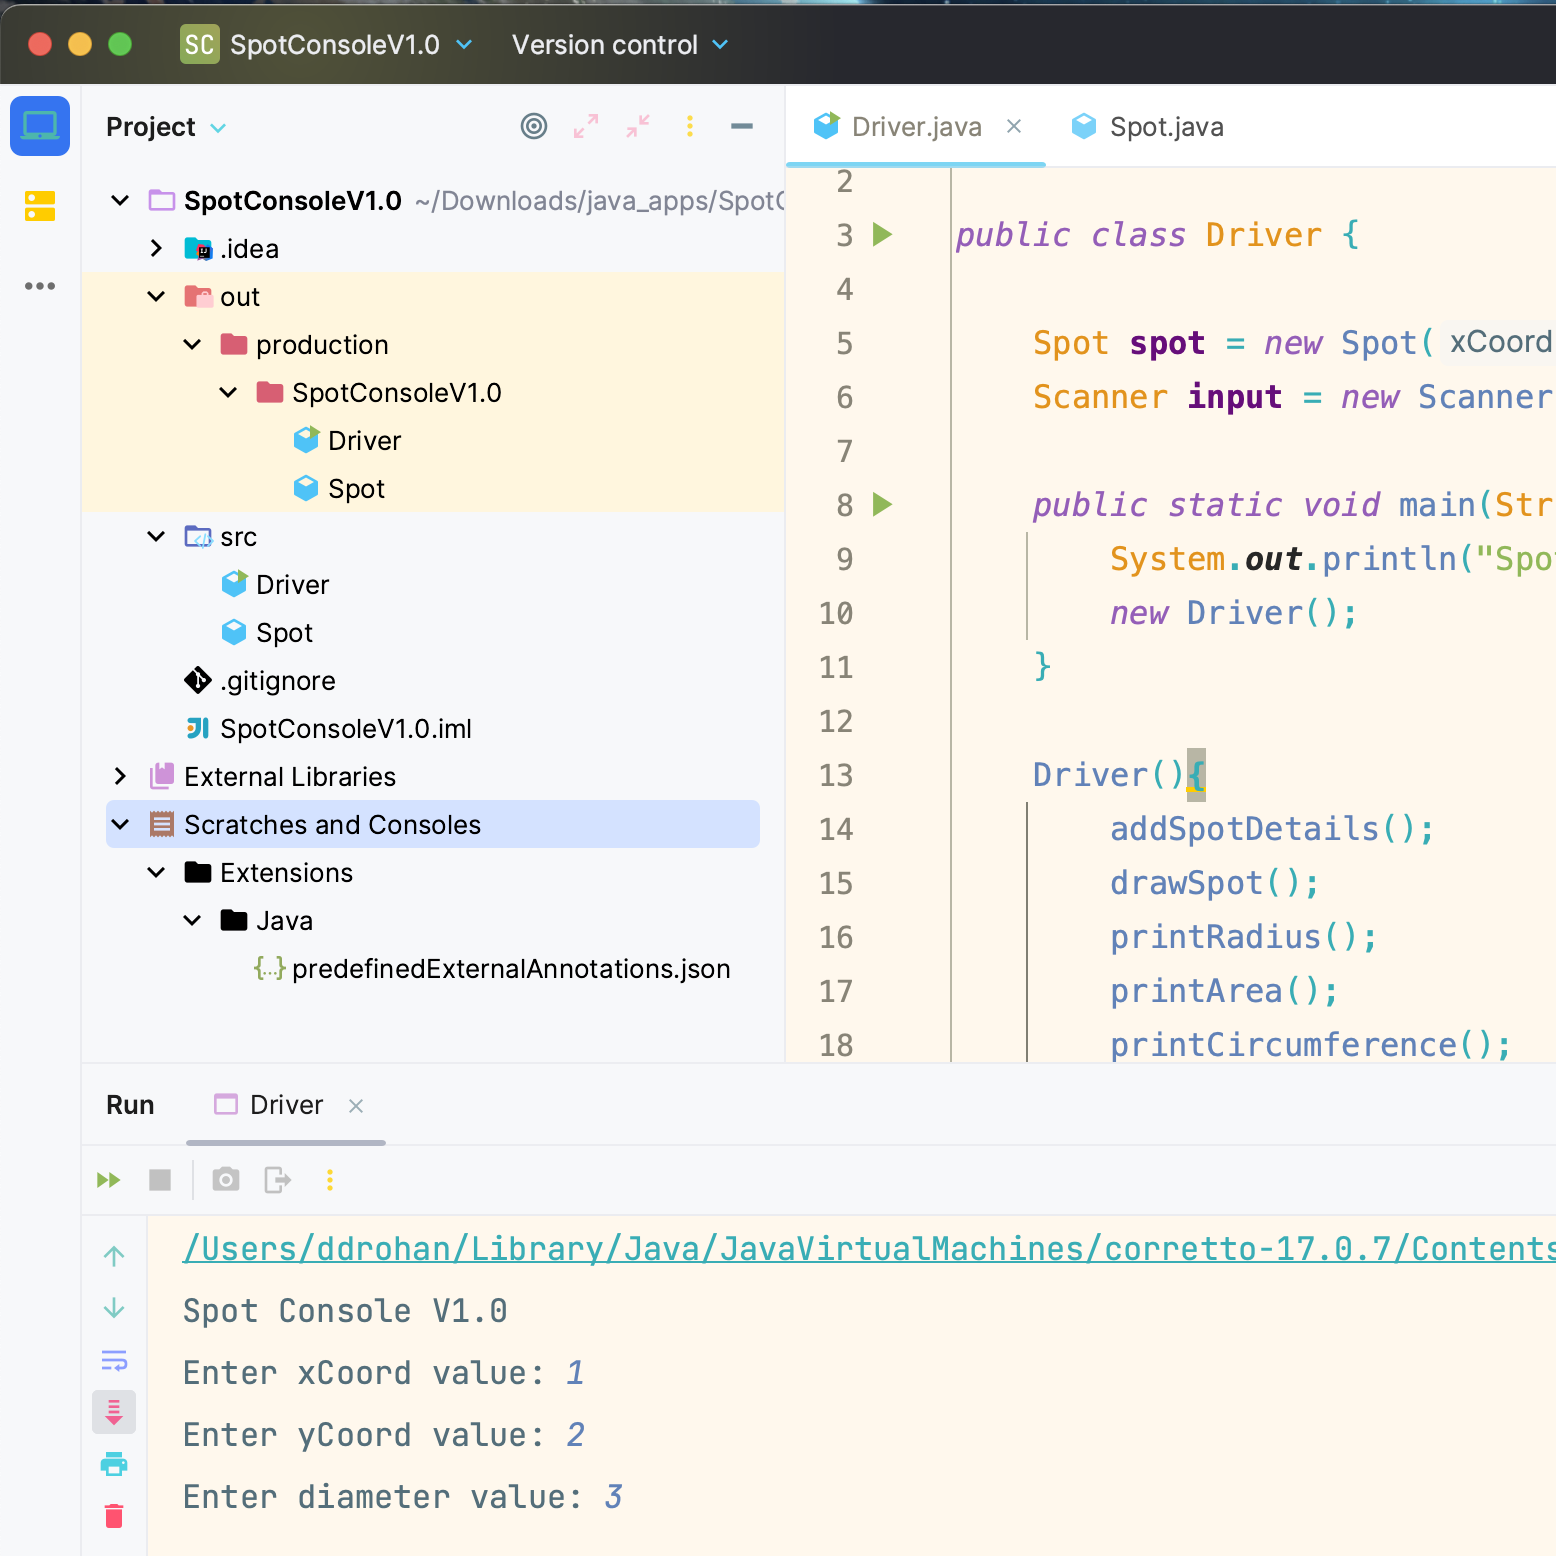
This program, when run, will print Hello World into the console window.
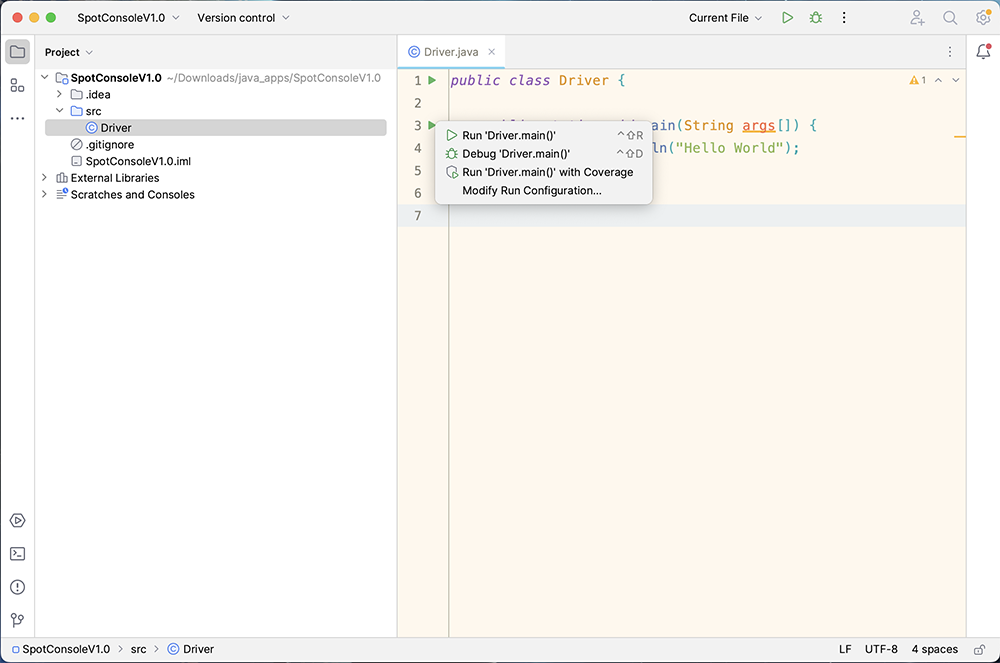
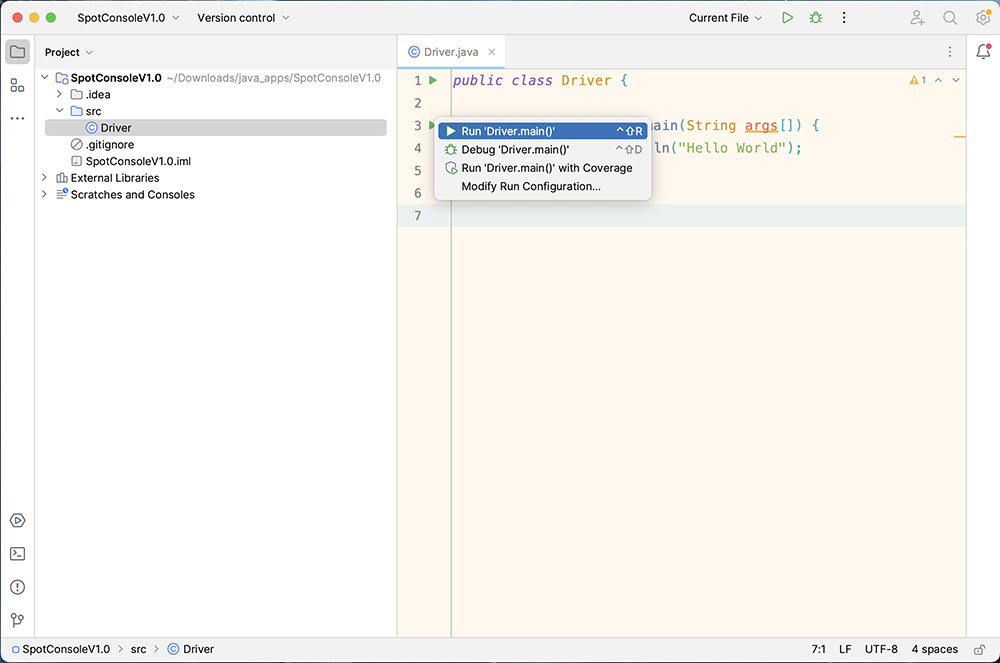
To run the program, click on the green triangle beside the main method. Then select Run ‘Driver.main()’:
Hello World should be printed to the console:
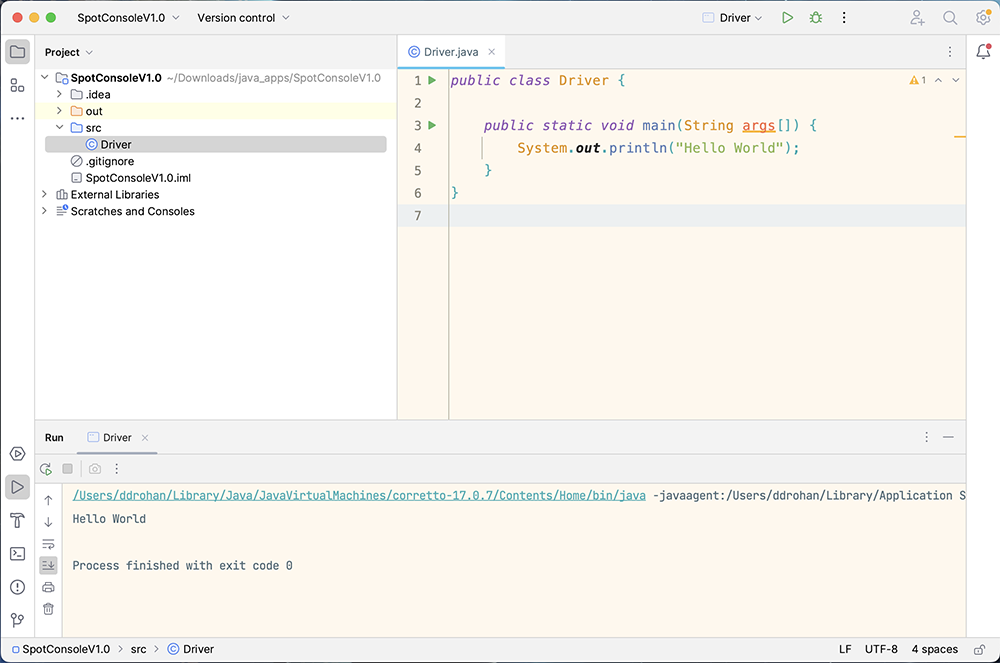
If you are not getting this result, you should flag this to your lecturer who can help diagnose and resolve the issue.