Lab 3 - Donation 2.0 (Mongo, Express & Node App)
In this lab we will be introducing some proper persistence, through a MongoDB backend, and if we have time, deploying our local web server to heroku so that everyone can see our web app!
Here's a link to some of the commands you'll be using throughout the lab [QuickLinks] docs.mongodb.org/master/tutorial/getting-started-with-the-mongo-shell/ but most of what we do in this lab we'll have covered in the lectures.
Objectives
In this Lab, you will be required to build the next version of our Donation Case Study Web App, called DonationWeb 2.0. We will build on the previous lab, so you can either use your own version of DonationWeb 1.0 or download the starter code here. In this version we will be implementing a MongoDB backend (and reusing our previous solution).
On completion of this lab you'll be able to
- create a NodeJS web app using express
- run this app as a NodeJS Server and process client requests
- be able to use npm to install dependency modules
AND
- store data in a MongoDB database
Step 2 - Setup
First thing you should do is download the starter code (or the solution to the previous lab) here and then extract it to your single parent folder for all your web app projects you created for previous labs.
Rename the extracted folder, (or copy your own version) to donationweb-2.0
Open your donationweb-2.0 web app (in WebStorm)
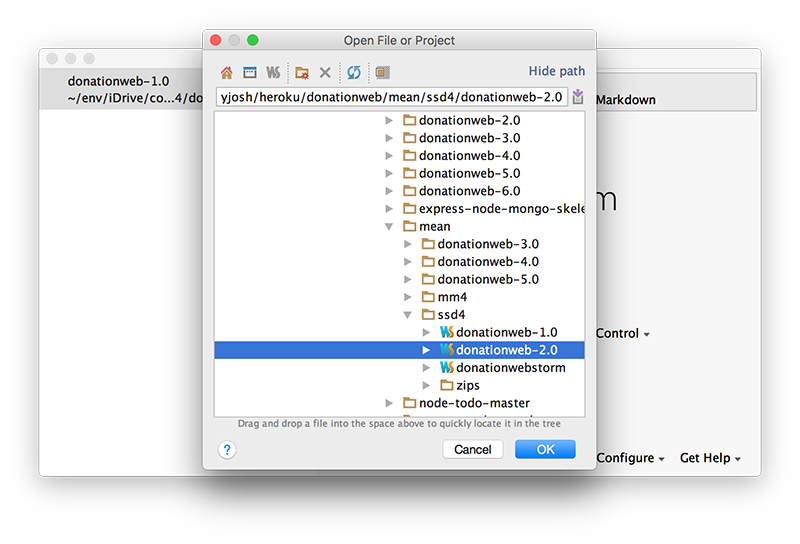
and then change your 'title' like so

and launch it.
You may not get any errors, but you should probably reconfigure your project (as it's a copy) and fix the node modules path as follows:
Open your preferences and navigate to the Library settings
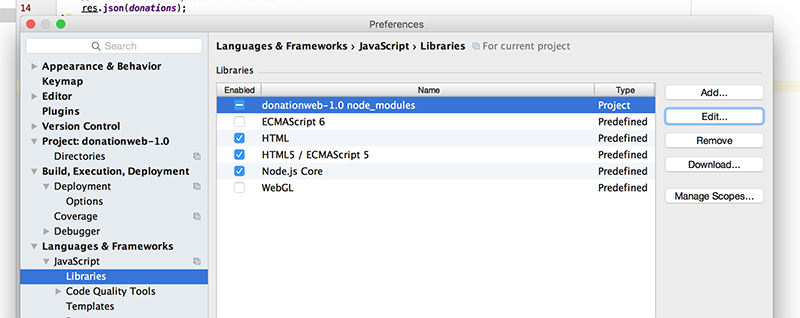
and
update your node_modules path to point to the current project

Launch it again, if everything goes to plan you should be able to visit http://localhost:3000 and you should see the following
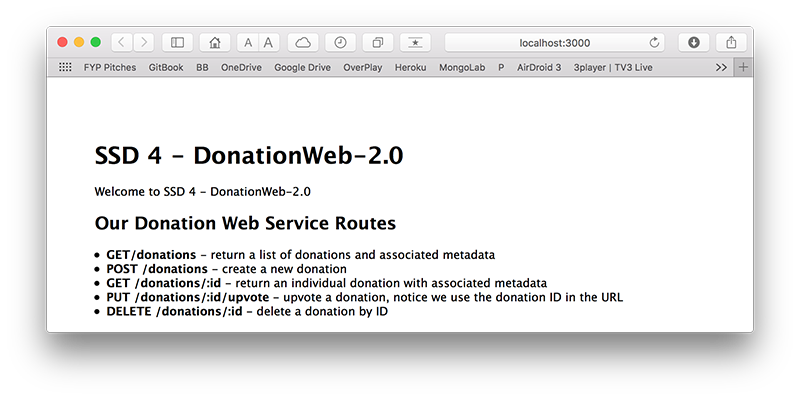
The next thing to do is to add the mongodb and mongoose module dependencies to our project. Launch the terminal window
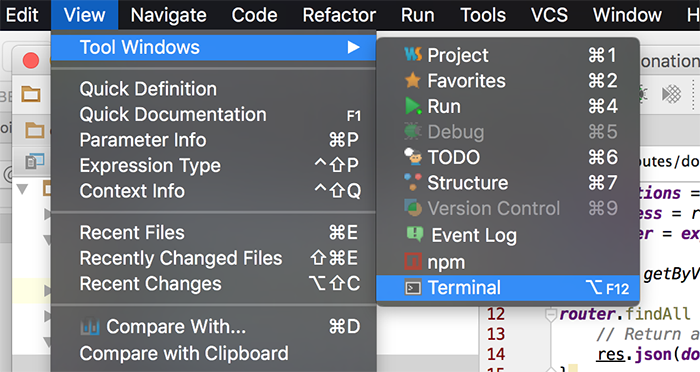
and run the following commands
npm install mongooseand
npm install mongodbYour project should now look like this
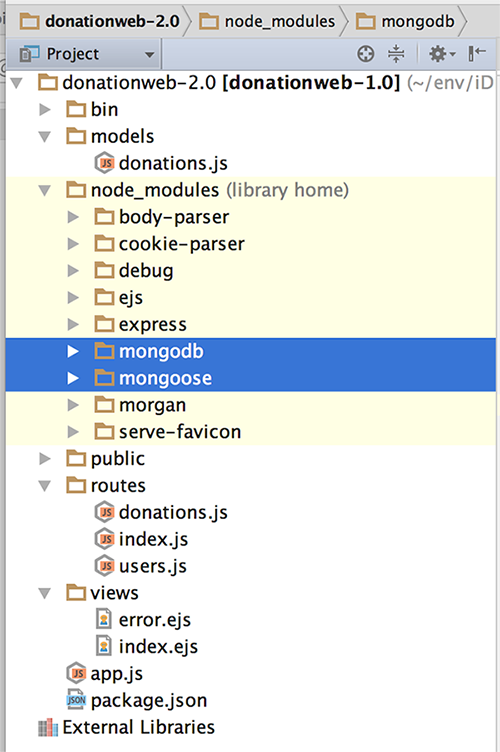
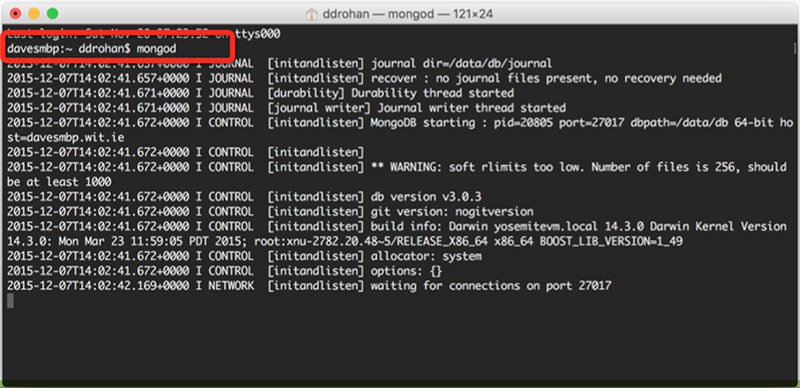
The last step in our 'Setup' is to kick off our localhost mongodb server and insert a few 'Donations' so we can test our refactored 'findAll' function (next step).
Open up a terminal window and launch the mongodb server
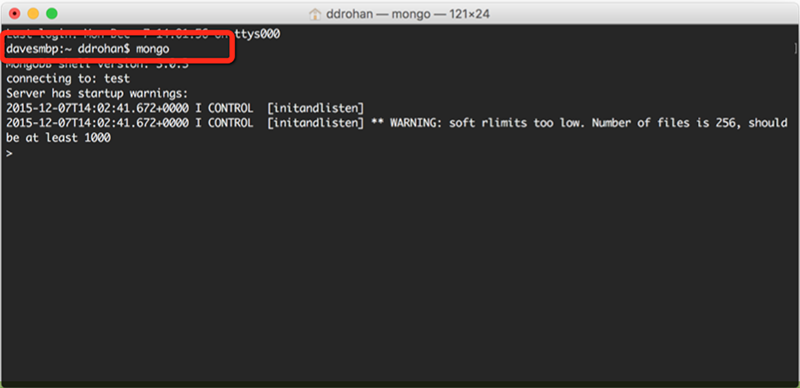
Open another, separate window and launch the client
In the client window, create/switch to the 'donationsdb' database
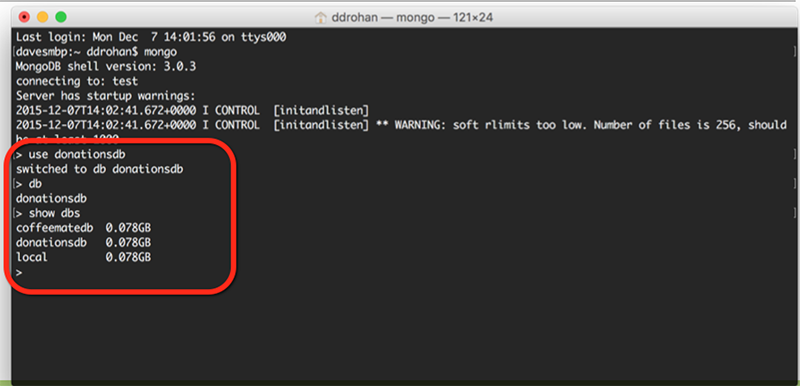
Insert a few records and make sure you name your collection donations and NOT donationsdb, (as in the screenshots), so you'll be saying something like
db.donations.find()etc. etc.
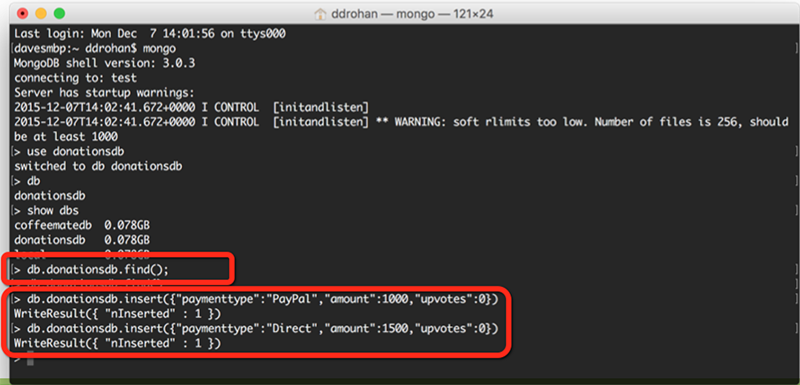
'Find' all the donations, just to confirm they exist.
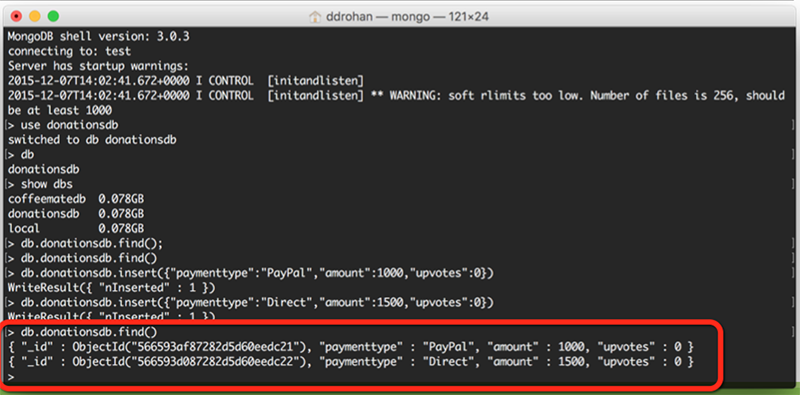
We now have a few records or 'documents' we can access via our Node Web Server (next step).
Step 3 - Creating our Database Schema
Our first step in making a persistent data store is to configure our data models. To do this, we are going to be adding a schema layer on top of MongoDB using a nice library called Mongoose. Before we begin, let's make sure our MongoDB server is running.
If Mongo isn't running on your machine, enter this into your terminal:
mongodand to run a mongo client
mongoWe connect to our local MongoDB instance by adding the following code into our donations.js routes file:
var mongoose = require('mongoose');

...

mongoose.connect('mongodb://localhost:27017/donationsdb');

var db = mongoose.connection;

db.on('error', function (err) {
    console.log('connection error', err);
});
db.once('open', function () {
    console.log('connected to database');
});
(It's probably a good idea to remove our javascript list altogether at this point as we don't need it.)
This will open a connection with the donationsdb database running on our Mongo server. Now we can modify our existing model and introduce a database schema.
Creating a Schema with Mongoose
In our models/ directory edit donations.js and replace the current 'model' with the following code:
var mongoose = require('mongoose');

var DonationSchema = new mongoose.Schema({
  paymenttype: String,
  amount: Number,
  upvotes: {type: Number, default: 0}
});

module.exports = mongoose.model('Donation', DonationSchema);
Here we've defined a model called Donation with several attributes corresponding to the type of data we'd like to store. We've declared our upvotes field to be initialized to 0.
Next we register that model with the global mongoose object we imported using require() so that it can be used to interact with the database anywhere else mongoose is imported.
It is strongly recommended to run your web server at this point, to ensure everything is configured correctly and before we go ahead an modify our routes to interact with the database.
So as before, go ahead and fire up the server - but make sure your mongodb is running first, and you get the 'connected to database' message at the console.

Step 4 - Modifying our 'Routes', Part 1 ( 'findAll' & 'findOne' )
Our current setup involves pulling data from a javascript object array and storing objects back to that array. We now want to be able to store and retrieve our 'donations' from our mongodb database.
The first thing we'll do is modify our 'findAll' route.
Modifying Our First Route - 'findAll'
Edit your routes/donations.js file and navigate to your existing 'findAll' function.
Now, replace it with the following :
router.findAll = function(req, res) {
  // Use the Donation model to find all donations
  Donation.find(function(err, donations) {
    if (err)
      res.send(err);

    res.json(donations);
  });
}
Notice how we use the Mongoose 'find' function to retrieve all the objects from the 'Model'.
Make sure you have the proper requires statement in your routes file
var Donation = require('../models/donations');to include the mongoose schema.
Testing Our 'findAll' Route
The Request
GETing all the donations in our mongodb database
/donations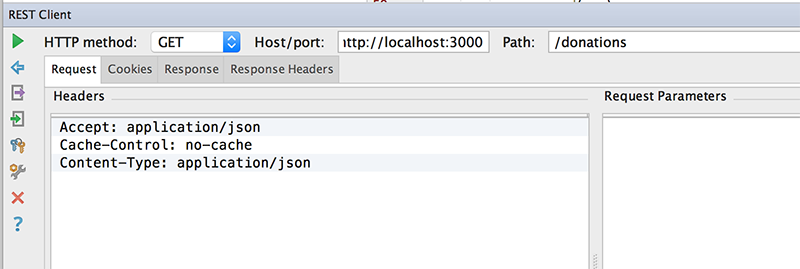
The Response
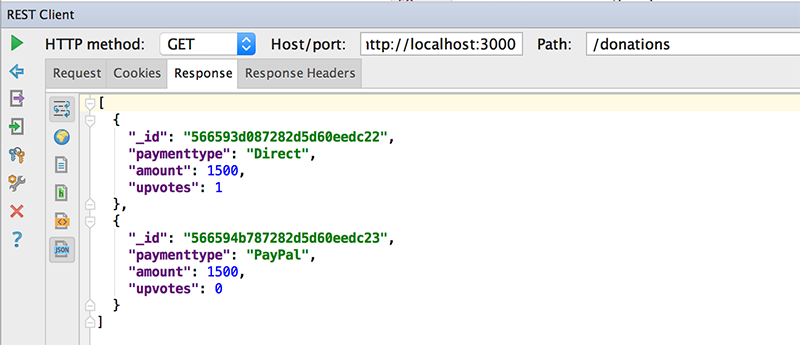
Modifying Our Second Route - 'findOne'
Our first route returned all the donations to a client, but what if the client only want's to get at a single donation from the database - that's what our next route 'findOne' does, so we need to refactor our current implementation to make use of mongoose.
router.findOne = function(req, res) {

    // Use the Donation model to find a single donation
    Donation.find({ "_id" : req.params.id },function(err, donation) {
        if (err)
            res.json({ message: 'Donation NOT Found!', errmsg : err } );
        else
            res.json(donation);
    });
}
Notice the use of the req parameter to pass in the id of the donation we require.
Testing Our 'findOne' Route
The Request
GETing donation with id '566594b787282d5d60eedc23'
/donations/566594b787282d5d60eedc23
The Response

requesting donation with id '566594b787282d5d60eedc233'
/donations/566594b787282d5d60eedc233
Step 5 - Modifying our 'Routes', Part 2 ( 'addDonation', 'deleteDonation' & 'incrementVotes' )
Modifying Our Third Route - 'Add a Donation'
Again, edit your routes/donations.js file and navigate to your existing 'addDonation' function.
And replace it with the following :
router.addDonation = function(req, res) {

    var donation = new Donation();

    donation.paymenttype = req.body.paymenttype;
    donation.amount = req.body.amount;

    console.log('Adding donation: ' + JSON.stringify(donation));

    // Save the donation and check for errors
  donation.save(function(err) {
    if (err)
      res.send(err);

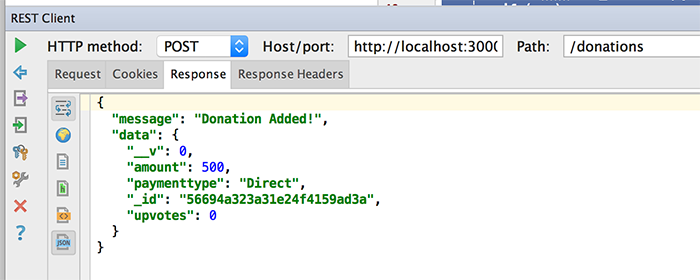
      res.json({ message: 'Donation Added!', data: donation });
  });
}
There's a bit more going on here, so make sure you understand the general jist of how this works. (But I'll explain in the labs anyway)
You may need to restart your server but if everything goes to plan, you should now be able to store and retrieve 'donations' from your mongodb database.
Let's test our addDonation using WebStorms REST Client (like before)
Testing Our 'Add' Route
The Request

We need to fill in the Request Body for our POST

POSTing donation data in JSON format
{ "paymenttype":"Direct","amount":500 }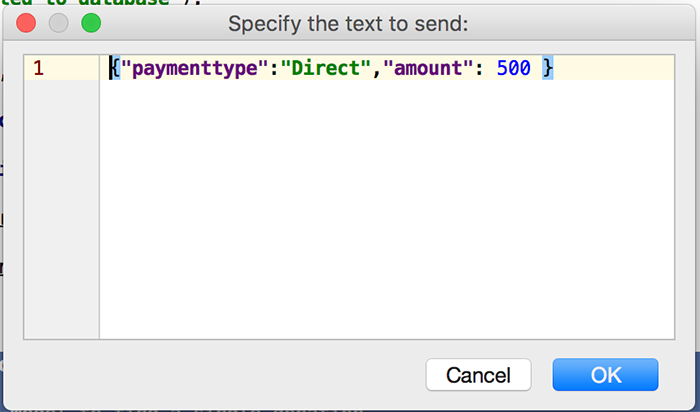
The Response
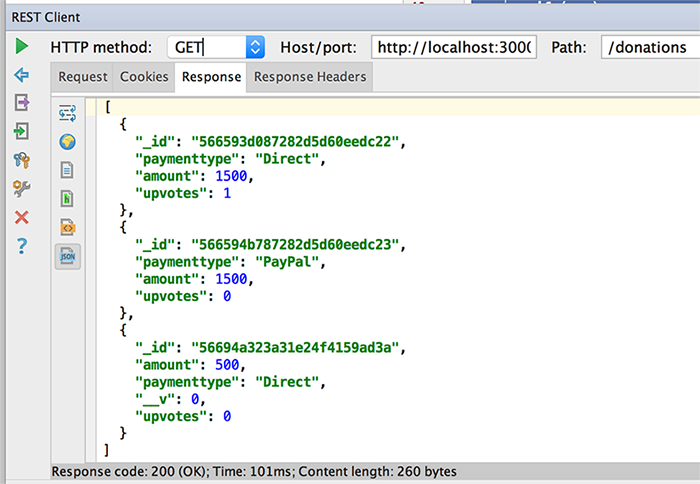
GET all donations again to confirm
Modifying Our Fourth Route - 'Delete a Donation'
Edit your routes/donations.js file and navigate to your existing 'deleteDonation' function.
Now, replace it with the following :
router.deleteDonation = function(req, res) {

    Donation.findByIdAndRemove(req.params.id, function(err) {
        if (err)
            res.send(err);
        else
            res.json({ message: 'Donation Deleted!'});
    });
}
Notice how we use the Mongoose 'findByIdAndRemove' function to retrieve and delete the object from the 'Model'.
Testing Our 'Delete' Route
DELETEing donation with id '566594b787282d5d60eedc23'
/donations/566594b787282d5d60eedc23The Request

The Response

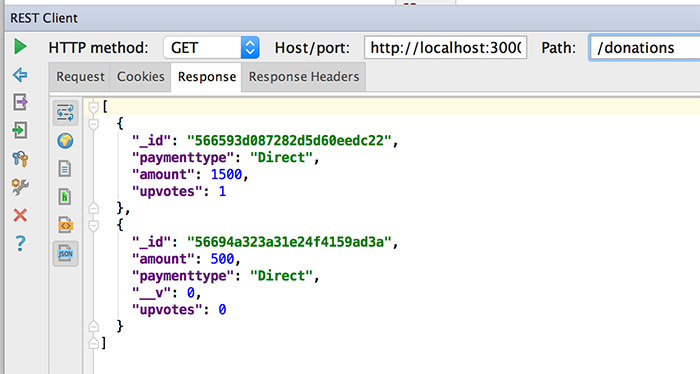
GET all donations again to confirm
Modifying Our Fifth (and final) Route - 'Increment Votes'
Again, edit your routes/donations.js file and navigate to your existing 'incrementVotes' function.
And replace it with the following :
router.incrementUpvotes = function(req, res) {

    Donation.findById(req.params.id, function(err,donation) {
        if (err)
            res.send(err);
        else {
            donation.upvotes += 1;
            donation.save(function (err) {
                if (err)
                    res.send(err);
                else
                res.json({ message: 'Donation Upvoted!', data: donation });
            });
        }
    });
}
Like last time, there's a bit more going on here, so make sure you understand the general jist of how this works. (But I'll explain in the labs if necessary?)
You may need to restart your server but if everything goes to plan, you might now be able to delete and 'upvote' donations from your mongodb database.
Testing Our 'UpVote' Route
PUTing (or updating) donation with id '566593d087282d5d60eedc22'
/donations/566593d087282d5d60eedc22/votesThe Request

The Response
BEFORE

AFTER

GET all donations again to confirm the update
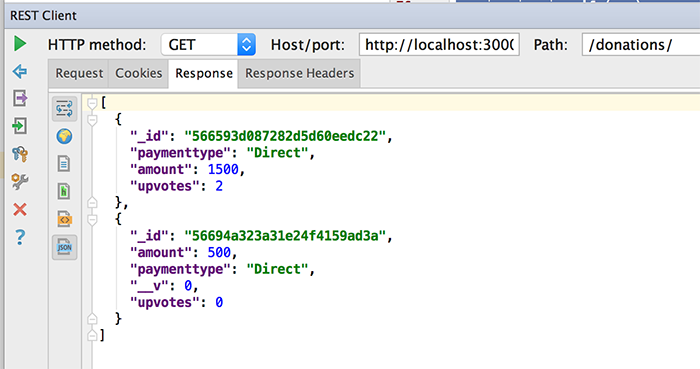
Step 6 - Updating our 'Views'
If you go ahead and try and delete or upvote a 'donation' you'll probably get some kind of error - and it's to do with the parameter we're passing to our 'delete' and 'incrementVotes' functions on the client side (in our .ejs file) - it's the wrong one.
To fix this, you first need to identify what is the right parameter to pass so you need to find out what is being sent in the response JSON string to the 'List All Donations' request.
Type the following in your browser and see can you work it out?
http://localhost:3000/donationsNow, you simply need to change the current parameter being passed to the one that mongo uses to uniquely identify an object in its collections.
Restart your server and give it another go and see how you get on?
Solution - Lab 3
You can find the solution to this lab here.